How to fit Architrave Moulding around a door frame with perfect mitres
How to cut, mitre and nail door surrounds, tips for fitting architraves to windows, loft traps and stair stringers too
Decorative Architrave, also known as door surrounds and door casing are the finishing moldings used primarily to frame doorways. I always try to install these after having hung a door and before installing the skirting boards up to the doorway.
Architraves are a really versatile molding that can also be fitted around loft traps, box sash windows, on stair stringers (to cover the join between stair string and plasterboard - pictured below left), as a wall batten to support or tidy up the front edge of shelves and any other areas that either need enhancing or hiding!
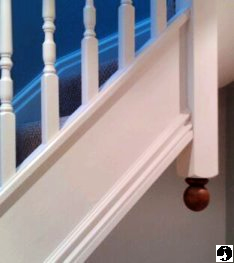 |
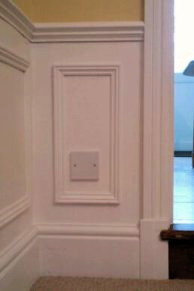 |
In period properties they can be found sat on top of plinth blocks instead of straight down onto the floor and the skirting board butts into those instead of the architrave (seen above right).
Common types Of Architrave profiles and materials
Some of the more common types of internal door case mouldings off the shelf though include:
- Square (simply 25x50/75mm timber)
- Bullnose, Chamfered
- Pencil round
- Torus
- Ogee
- Ovolo
All the mouldings are available in MDF (often primed), softwood (pine, spruce etc) and hardwood (oak, mahogany etc).
The tools, nails and glue I generally use to cut and fit architraves with are;
The tools I use to install Architraves
- The right Carpenters pencil
- Chop/miter saw (can use hand mitre saw instead),
- Tape measure,
- Combination square
- Hammer
- Nail punch
Which fixings I use to install architraves
- 30-50mm oval head nails (or even better a second fix nail-gun if you have one)
- PVA wood glue (and/or mitre adhesive)
How much architrave do you need per doorway?
When it comes to calculating material quantities, for a standard internal doorway, a 2.1m length is usually long enough for each leg or door jamb, and 1m wide enough for the head.
So to do both sides of a normal doorway I would buy 2x4.2m for 4 legs and 2m for the two heads (10.4m altogether).
Variations of a normal 'doorway' might include storey linings (Glazed panel above the door for extra light) and double doors. As always have a measure up and find the most economical lengths for the job.
Step by step instructions for fitting architraves to a doorway
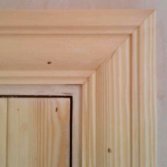
The moulding needs to be set back slightly from the front edge of the frame. There's no right or wrong measurement, go for around 5-10mm just don't make them so big you don't have any door lining left to nail the moulding to. Mark a few lines around the lining and crosses at the corners where the architraves will intersect. Tip: The mitre is always more important than the margin, when fixing in place make sure the mitre is always perfect - even if that means it puts the margin out a tiny bit. A bad mitre with filler in is much more noticeable after decorating than a slightly smaller/larger margin. This is what the mitre and margin should look like: |
 |
- Step 2: Measure and select timberCut two lengths long enough for the legs. 2.1m is normally enough, but double check. If you have 75mm architrave for example, you can measure up to where the pencil lines cross and add 85mm. Cut a 45 degree angle on the left hand side of a piece long enough for the head.
- Step 3: Mark, cut and fix first leg.
Some people cut and fit the head first then measure up off the floor for the legs. The problem with this is if you cut a leg to length and the 45 doesn't fit perfectly, when you adjust the mitre on the leg it will need to be lifted off the floor a little. That's OK if carpets are being fitted, but not if you are on a finished hardwood floor!
Instead, hold the left leg up to the marks on the door lining and transfer the cross where they intersect onto the inside edge. Turn the chop saw 45 degrees to the left and place the moulding on, with the square edge pressed tight to the back of the fence. Keeping the blade to the right hand side of the line (the ‘waste’ side) cut the mitre.
Offer this up and nail to the door lining using 6 or 7 40mm oval head nails. I use p.v.a. Glue on the back as well, where it will touch the door lining.
- Step 5: Cut and adjust the head
Next, cut an opposing mitre on a piece long enough for the head and place it in line with the margins, so the mitre is tight. Often the door linings are fitted badly and the head is out of level. If it’s not a perfect fit you will need to adjust it.
This is easiest with a chop saw, if the outside points of the architrave touch but there is a 2mm gap at the inside for example, you need to adjust the saw angle so it will cut 2mm off the point down to nothing at the inside edge, and vice-versa. If you are using a hand mitre saw it will be easier to adjust the angle on the saw and re-cut the work piece completely, instead of trying to take a little to nothing off the end.</p>
When you are happy with the fit hold in place and mark the opposite miter, then cut this too. Before you glue and nail this on,
- Step 6: Cut and fix last leg
lift the right leg up and mark where the angle needs to be cut. Fix the head in place and check the right hand miter fits, then glue and nail.
I also put a nail into the miter, down from the top if possible so it can’t be seen. Once everything is pinned on, go round and punch all the nails in. Wipe off any excess glue and sand if necessary as well.
How to find or bisect unusual architrave angles
|
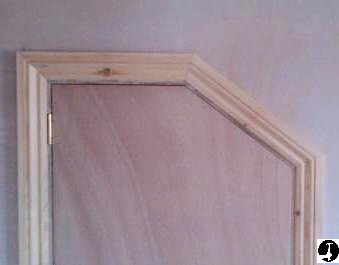
If you are working on an angled door, and you need to bi-sect and calculate the architrave angle there are a couple of different methods you can use. By far the quickest and most accurate way is with an angle finder. All you have to do is push it into the angle like a bevel, tighten the thumb turn and it automatically displays the bisected angle you need. I use mine for much more than just architraves and people always want to borrow it! If you haven't bought one of those yet you will need to do it the old fashioned way. There's a page with more info about bisecting angles here. |
 |
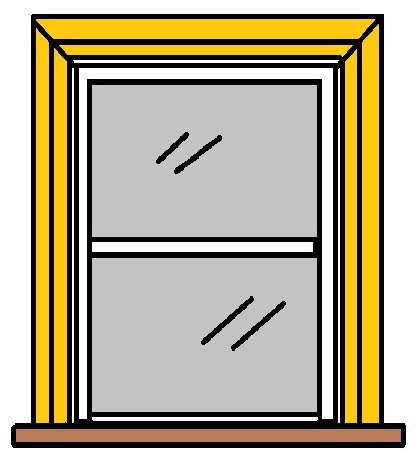
Victorian sash window architraves
|
In Victorian houses the windows are often framed with the same profiles used on the doors in the house like the picture above. For this to happen the nibs on the front of the window boards need to overhang the edges more than usual so there is enough room for the architrave to sit down on top of them. I usually add twice the width of the architrave plus 50mm (2") to the width of the window board in between the walls to have enough of an overhang. Click here for more help installing window sills Apart from that installing is the same as with a door, mark a small margin from the edge of the reveal before cutting and fixing. The reveal is timber so can fix into that and Gripfill to the wall as well for a more solid fit. |
  |
What comes next?
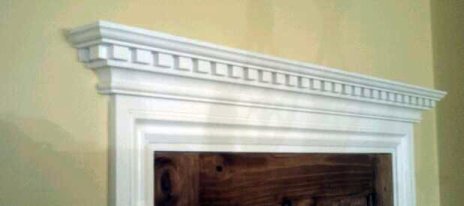
For something different add a cornice over the top of the door surround like in the picture below
Once you have finished installing architraves around all of the doorways you can move on to installing the skirting (Base) boards.
Click here for step by step instructions for fitting Skirting boards perfectly
Or here for help hanging a door perfectly
Have a question or comment about installing architrave?