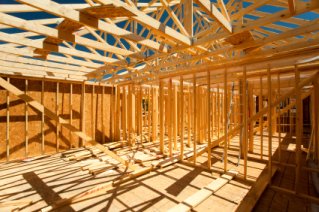
Learn Framing Carpentry
First fix - Carcassing - Structural carpentry
|
Framing carpentry or first fix carpentry generally includes all the big heavy structural carpentry jobs that take place before the plastering. A first fix/framing carpenters tools need to be strong and good quality to withstand the heavy work involved when working with heavy timbers, often outside in the rain. I use a much larger/heavier hammer and nail-guns than for finish carpentry and also a better quality tape measure. The pages below are in the order you would most likely encounter them on the building site; |
 |
Framing Carpentry Tools & Techniques
Don't be seen dead on site without your hard wearing carpenters pencils!
When fixing roof rafters and timber stud walls you will need to learn this simple nailing technique for strong joints
No matter how good you are there will be times when you need to dismantle timber or remove nails in the wrong places
Power your tools with 110v and grab a transformer so you don't electrocute yourself..
Everything you do during the first fix framing stages needs to be perfectly square and level. This will make all the jobs that follow much easier
How to build a roof
Assuming the house walls are brick and block work, one of the first jobs the first fix carpenter could be called in for would be to put the roof on;
This page covers off the different types of roof and identifies the components you need to cut and install
One of the most common and simplest roof types is a gable to gable roof made up of simple common rafters
Hipped roofs are slightly more complex with hip rafters to the corners and jack rafters filling in between
First up, fit the wall plates. It is these that the roof rafters will be secured to
The common rafters are the angled timbers from the wall to the ridge that take the weight of the roof
The bottom of the rafter feet are tidied up with fascia and soffit boards. These also close the gap to prevent wildlife / wind getting into the roof and provide a surface to fix the gutters to
Check out a random job I did in Ascot (Berkshire) to give these roof dormers some style
Framing Carpentry - Floors
(More pages coming here soon covering off floor joists and trimming)
Wall Framing, Doorways & Plaster-boarding
Setting out and framing walls is a standard carpentry task. There are endless variations and types but the basics are always the same. Click above for instructions on building solid and level stud-work walls. Once built, you can;
Noggins, otherwise known as blocking and bridging are used all over during framing carpentry to stiffen structures and to provide a fixing for sheet materials and more. There are a few types like straight and herringbone struts, click the link above for more info.
The door lining must be fitted square, plumb and in wind so that the door functions properly and the architrave miters are quick and easy to get to fit perfectly.
Sometimes part of the fine finish carpentry but these are also often installed during the framing stage so the plasterer can plaster around them neatly.
Once the timber stud work walls are framed, door linings fitted and windows trimmed, you can start screwing the plasterboard to them
Ceiling Carpentry Jobs
For access into the roof or attic space you will need to install a loft trap. Some of these can have a drop in lid, others hinged or even a pre-made system with a ladder fitted that can be stowed away in the roof when not in use