Building a Loft Conversion from start to finish
How a Loft Conversion is Constructed Step by Step
Thinking about building a loft conversion? Even with two identical houses, no two lofts are ever the same and there will always be slight variations. This page contains the general building process I follow and the stages at which the building inspections are made.
Obviously I have all the necessary planning permission in place and in writing (I did it on building notice, as it fell within permitted development rights) before starting, and get the scaffolding up.
There is much less mess made in your house if you cut through for the loft conversion staircase at the last possible moment when the first fix is done and all the walls in the new loft are plaster-boarded, ready to fit the stairs.
Building a loft conversion: step by step
Stage 1 - Windows and floor structure
|
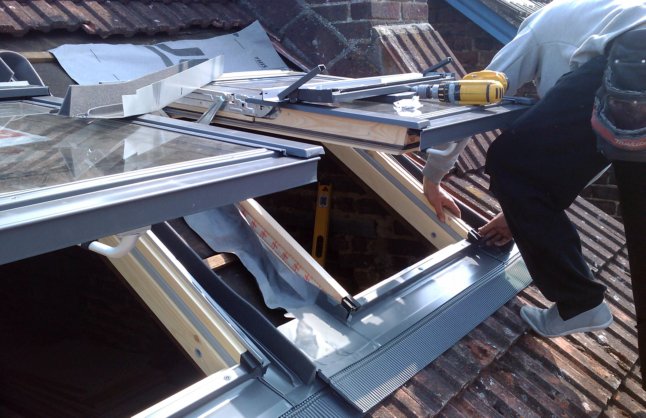 |
Installing the Velux windows
 |
|
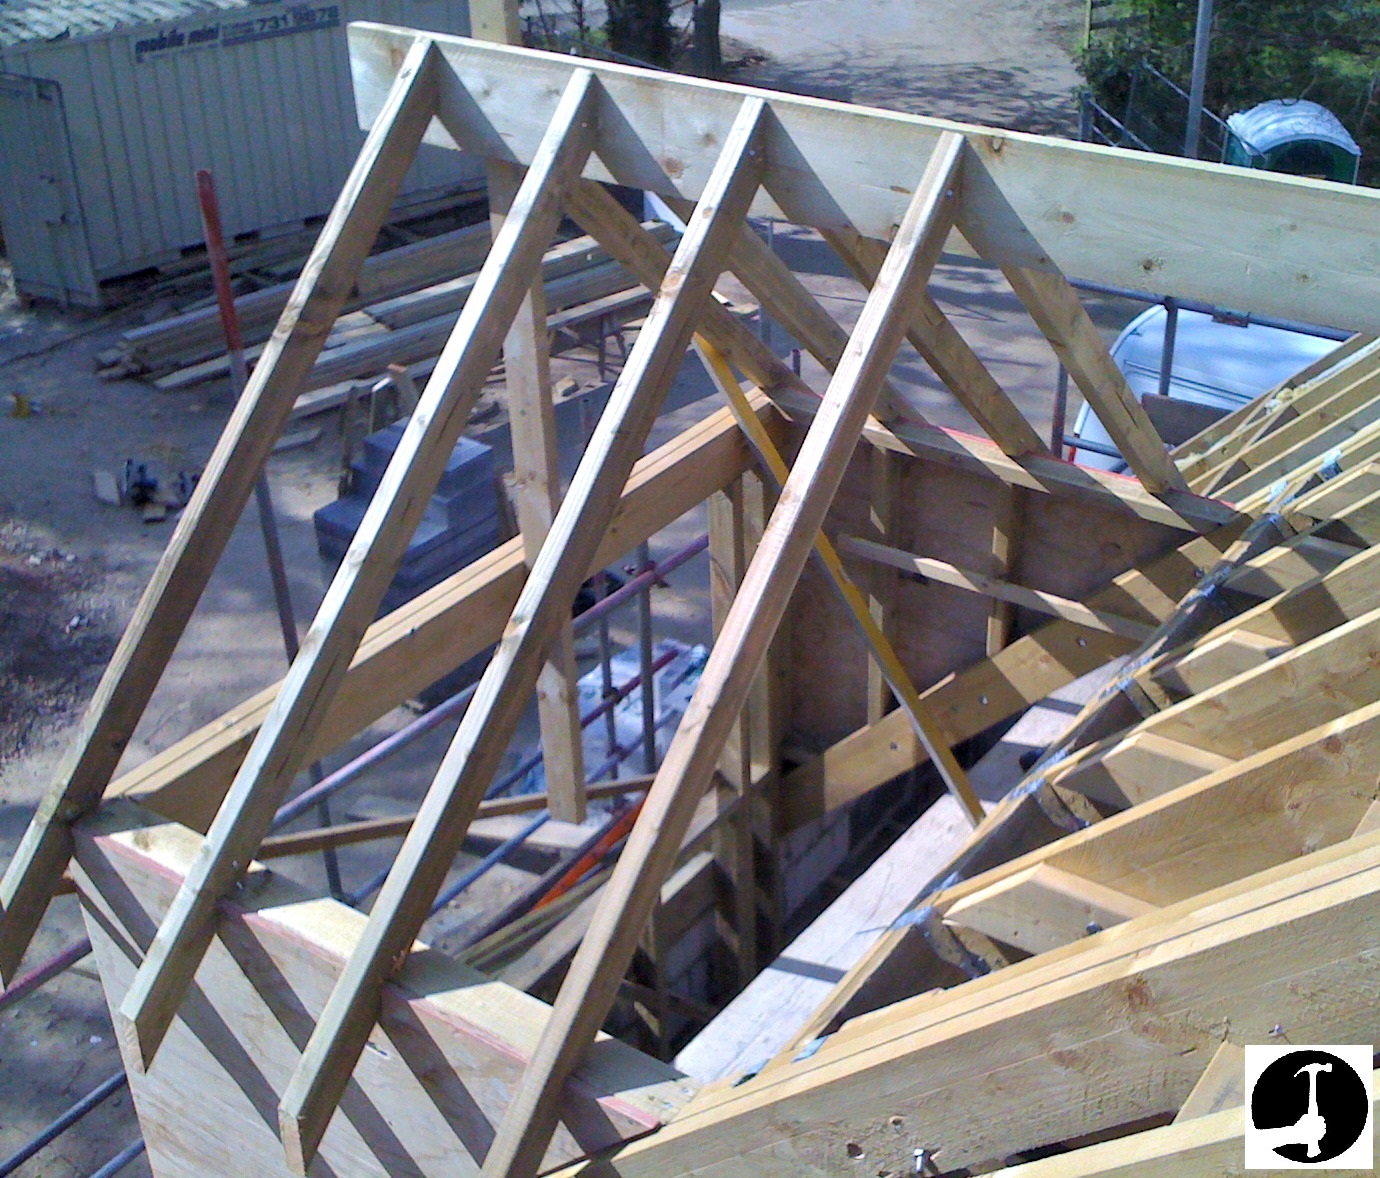
- Dormer windows - If you are building a loft conversion with dormer windows, they can be installed at this stage. Generally ridge heights need to be kept below the existing to comply with planning. For looks it's best to line them up with the windows below or to space them equally across the roof.
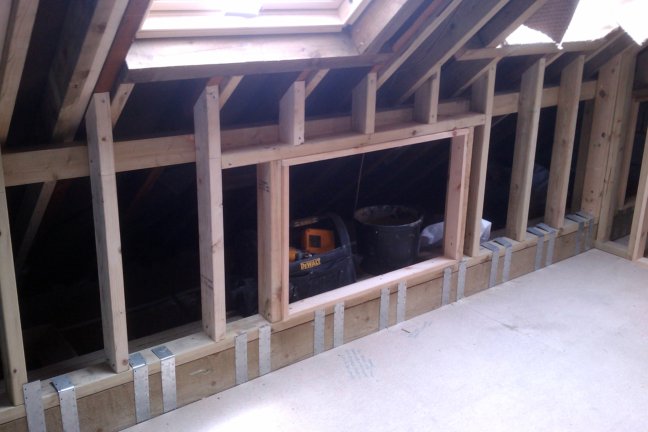
- Cut and install sheets of 22mm thick chipboard flooring down in the voids, behind the beams. This is easier before the purlin wall is built and doors can be installed in the purlin wall to provide access into the void for extra storage space.
- If you are building a loft conversion in the UK, some building inspectors want chicken wire put down before the insulation if the ceilings below are plaster and lathe. This stops the loft conversion insulation falling on peoples' heads if there's a fire or if the ceiling comes down for any other reason. I had already ripped down my existing plaster and lathe ceilings and replaced them with 12.5mm plasterboard for 1/2hr fire protection, so didn't need chicken wire.
- A plumber will likely be called out during this stage to move the water tank. I changed to a combi-boiler so didn't need one, but often coffin tanks are used and placed in the void behind the beams.
First loft conversion building inspection stage (structure)
Building inspection – before the flooring goes down a visit is made by the building inspector to check that you are building a loft conversion properly, to the approved plans and that the build quality meets relevant building codes.
Stage 2 - Lay the floor, finish carcassing/first fix carpentry and first fix plumbing and electrics. Insulation
- First fix plumbing – The plumbers can begin their carcassing work for radiators and en-suites once the floor joisting is done.
- Lay the floor once the inspector is happy with the structure and insulation, and the pipework is in place. I used 22mm moisture resistant chipboard 2400x600mm sheets.
The rest of the structure includes doubling up rafters, building any dormers (if there is a large flat roof dormer going up this may need to be built before the joisting can be finished in stage 1), ceiling collars (sometimes need to be bolted), flitch plates, purlin wall and purlin, pinch binders, (internal stud walls aren't always structural), fit all of the door linings and trim out a loft trap in the small ceiling above if there is room for any storage there.
Velux's, beams, joists, flooring, Purlin wall and door frame to void access installed
- First fix electrics - the electricians can fit all the cables for lights, sockets, T.V. aerials, smoke detectors and phone lines etc. when the walls are up.
- *Insulation regulations are always changing make sure you are up to date and follow the approved spec when building a loft conversion*
Other loft conversion insulation will include solid sheet/board insulation like Celotex to purlin walls(100mm) and skeelings (underside of rafters/angled ceilings - 70mm), 100mm rolls of rock wool sound or Fibre-glass heat insulation in between studs of internal walls and above ceiling collars. Multi-layer insulation like Thinsulex over rafters. This will need to be counter battened for the plasterboard as you can't screw through Tri-iso/Thinsulex, the screws just get wrapped up in wool. Some flat roof dormers need 70mm between ceiling joists and 35mm over the top, before plasterboard.
Second Building Inspection
Once the loft is insulated the building inspector will make another visit to again check that the construction and insulation is to the required standards.
Stage 3 - Plasterboarding
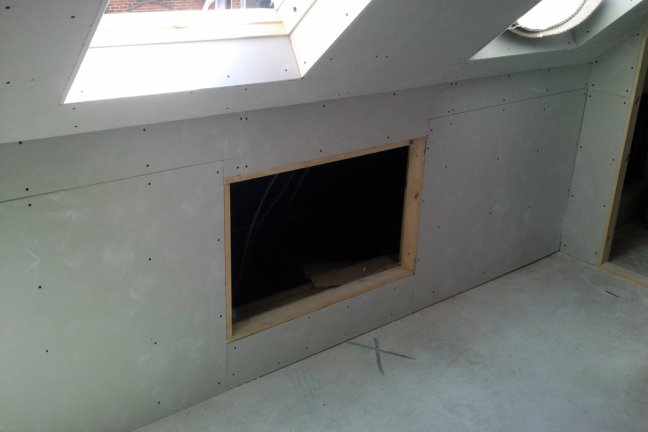
- Plaster-boarding – Once the insulation is installed the 12.5mm plasterboard can be cut and installed. Foil backed plasterboard is used on the skeelings to prevent condensation seeping through. Use foil backed plasterboard on ceilings and bathroom walls if you're not using aqua board or marine ply where the tiles will be.
Insulation and plasterboard installed
Stage 4 - Stairwell
Once everything that can be done before breaking through into the main house is done, cut out the stairwell ready for the staircase to go in. You'll need a mask no matter what, but if it's a plaster and lathe ceiling it will be a seriously messy job. Vacuum as much crap off the top as possible first. The dust is black and gets everywhere, so dust sheet everything up, and seal all the doorways shut. I've even in some instances nailed a tarpaulin with battens to the wall underneath to catch everything as it's kicked down then cleared it from above. Another thing you can do is screw a tarpaulin to the ceiling with battens around the stairwell (bang nails down from above in the corners so you know exactly where to batten) and the tarp acts like a shower curtain guiding all the mess straight down onto the floor.</p>
Trussed roofs with plasterboard ceilings are nowhere near as messy.
- Install the stairs! After you install the new loft conversion staircase, it is pretty rewarding walking up the stairs for the first time when the two levels are linked. The underside will need to be plaster-boarded and if there's a turn like in a winder flight you may need to form the curve with battens and EML mesh. I cut little bits of strapping off the strip to use like washers when fixing the mesh to the battens with 40mm plasterboard screws. If it's not tight the plasterer won't be able to finish it.
- Any internal walls that are to be moved can be done now. The messiest part of building a loft conversion has been completed before this stage and confined to the attic. Electrician will make another visit if they're routing their cables down the back of the staircase and into the main house.
Stage 5 - Plastering
Once the staircase is in and the first fix work is all complete the plasterers can start. It really begins to look like a room/part of the house at this stage
Stage 6 - plumbing and electrical second fix
- This includes radiators and if there is an en-suite this can also be plumbed in and tiled. A mechanical extractor fan is required for ventilation in a loft bathroom that will be connected to a tile vent. This will help avoid damp and mould building up.
- The Electricians can fit fire/smoke alarms, plug sockets, lights and switches, TV points and upgrade the fuse board if necessary. If the voids are large it's a good idea to fit lights in there.
Stage 7 - Finish Carpentry
Once the plaster is dry and all the other trades are done the second fix carpentry work and making good can begin.
|
This will include;
|
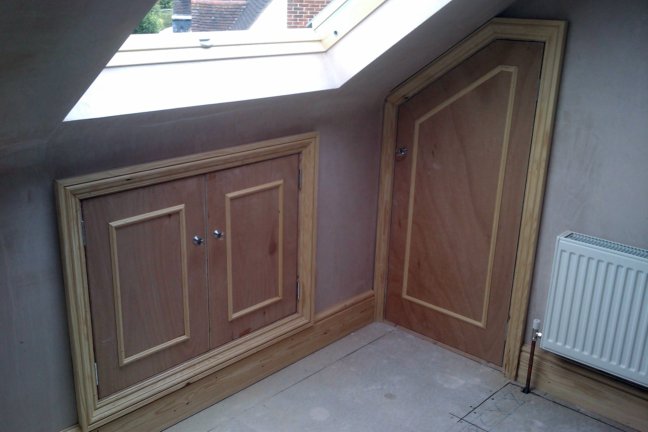 |
When building a loft conversion whether a DIY project or professional job, the finishing stages are all about seamlessly tying the new loft conversion into the existing home, like in the picture above. Done properly and with matching materials and mouldings, the new loft can seem like it just 'grew there', and decorated seem like it has always been part of the house.
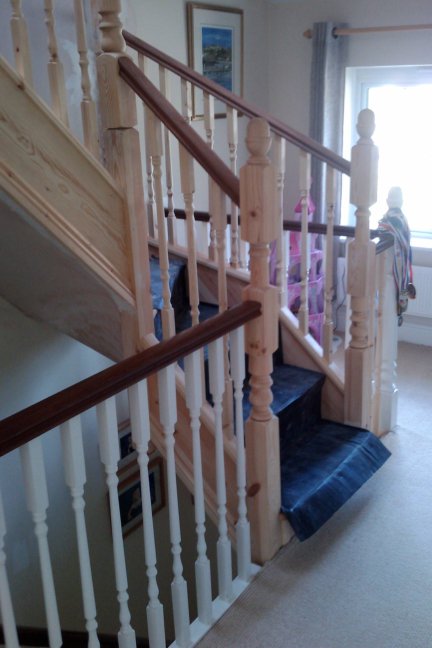
New stairs, spindles and handrails finished
Final loft conversion building inspection
You've almost finished building a loft conversion! The final inspection can be done now, as the rest of the jobs aren't subject to regulations. Pass this and you can crack open the champagne! Some of the checks will be staircase headroom (2m), hand-rail height (900+), spindle spacing (max -100mm), FD30 doors, intumescent strips, fire alarms, window heights/guard rails to low windows, pressure check any new drains, adequate soffit/roof ventilation, insulation on the back of void space access doors.
Final stage - Decoration and carpets
- Decoration - many people I've worked for choose to decorate themselves at this stage to save money after having spent out for everything else involved with building a loft conversion. A professional job is almost always better and much quicker.
- Carpets - Last of all, lay or have the carpets laid professionally and then..
Put your feet up, relax and enjoy! Oh, and get all the furniture up..
Click here to go to the main Loft Conversion page
Have a comment or question about building a loft conversion?