3 ways to end skirting boards like a Pro when you can't miter them around or butt into a normal corner
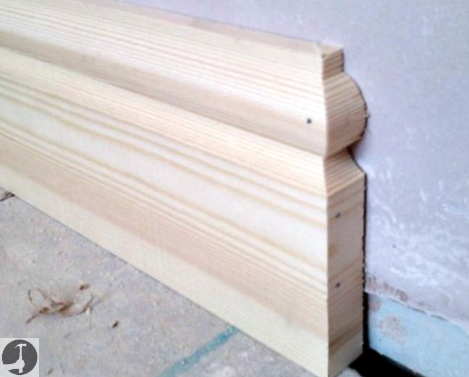
Sometimes you need to end skirting boards in the middle of nowhere because you can't mitre or butt the skirting board into a wall during a finish carpentry project. A common DIY mistake is to just cut the board off square but this leaves the end grain visible, looking unfinished and lacking the attention to detail good finish carpentry requires.
This page explains a couple of the different professional ends you can apply to finish the skirting boards off neatly (also applies to picture rails, dado/chair rails and other decorative mouldings).
The pictures are of Torus baseboard mouldings but the same technique can be used on ogee, pencil round, chamfered, bullnose and any other type of skirt board.
These methods also apply to dado rails, coving, crown moulding and almost all other decorative mouldings that need to end abruptly.
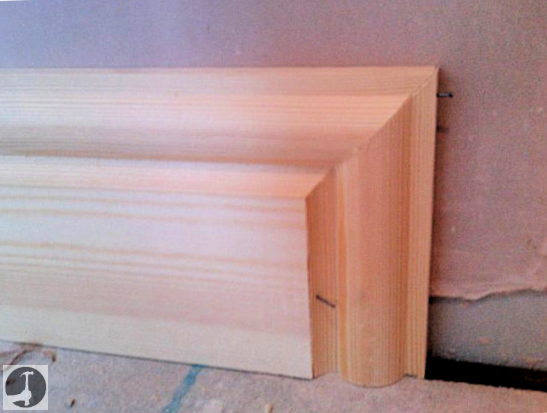
Method 1: Return miter the skirting board back into the wall
Cutting a normal external mitre on the end of the board and a small return piece makes the skirting appear to turn into the wall, creating a really neat finish. This is how I would normally end skirting boards.
There are two ways to create this effect, the first is to cut mitres as described above. The second is to simply use a coping saw to cut the shape of the moulding onto the end of the board.
This isn't always possible if the moulding is intricate or if you are using double sided skirting like I am though. It also leaves the end grain visible which is best avoided if possible, as it doesn't paint up as well.
First, I cut the board to the length I want with an external miter and fix it in place.
 |
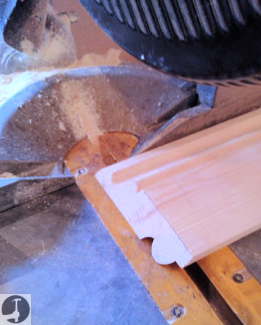 |
Then to cut the small potentially tricky return piece mark a square line on a piece of skirting and cut a miter in the opposite direction to the one before. Turn the board face down and place it on the mitre saw like below (the skirting is double sided, it is face down!).
Because you can see where the mitre ends it is much easier to cut this return piece off slowly from the back.
Use plenty of wood glue and tiny veneer pins to fix the return piece without splitting it.
Method 2: End the skirting board by mitering it down towards the floor
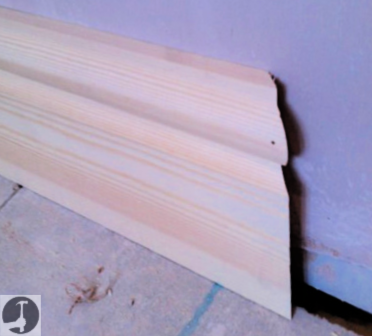
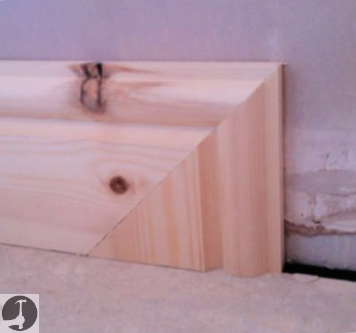
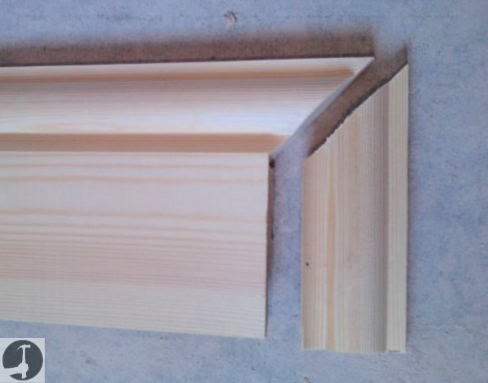
Rather than mitering the board so it appears to turn into the wall, it can be mitered downward towards the floor. This also solves the problem of having visible end grain or an unfinished or DIY look to the board.
There are also two different ways this can be achieved. Firstly you can cut the board to length and then cut a 45° angle down and across from the top corner.
Or instead, you can cut the 45° angle just through the moulding, then cut down the rest of the board square. Doing it this way is slightly trickier to cut but does make it easier to glue and fix the return part to.
It looks better this way as well, because you don't have the long miter visible on the flat part of the board, which if the boards are cupped will need a bit of sanding up before it's finished.
 |
 |
How to end skirting boards at the architraves
Sometimes an occasion pops up where you can't just butt the skirting board into the architrave to finish it. Sometimes it's because the skirting is thicker than the architrave. Depending on the property in this instance I might make up loads of plinth blocks to install. If it's a one off situation that doesn't want plinth blocks then you can sometimes get away with a small chamfer on the proud part of the skirting board, just so it doesn't look so odd.
What comes next?
Click here for help fixing skirting boards to the walls
Click here for help cutting internal skirting board corners
Or click here to go back to the main skirting board page
Use the comments section below if you know another creative way to end skirting boards?
