Fitting a mortice latch, strike plate & door handles/knobs
Door latch types, sizes and fitting tips
This page has everything you need to know about fitting a mortice latch perfectly. It's easy when drilling to come out the side of the door so you've got to take your time when setting it out and doing the work. How do you choose which size door latch to use?
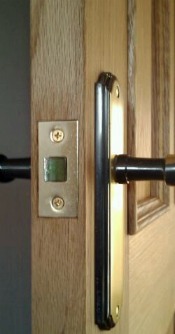
The difference in sizes available refers to the length from the face plate to the centre of the square spindle hole, and governs how far into/across the door, that the handle or knob will be fitted from the doors leading edge. When fitting a mortice latch in paneled doors, choose the one that puts the handle closest to the middle of the door jamb otherwise it can look odd when fitted off centre. For flat ply flush doors it doesn't matter what length latch you use. |
 |
Which tools do you need for fitting a mortice latch & door knobs/handles
The tools I use to fit a door latch are;
- sharp pencil
- Tape measure
- Hammer
- (powerful) cordless batter drill/driver
- screwdriver bits
- 16 and 25mm Auger or flat wood drill bits
- combination square
- 25mm chisel
- mortice/marking gauge
- Stanley knife
- sticky tape
Step by step guide to fitting a mortice latch & door handles
- Step 1: Establish the handle height and mark the door
The normal height for fitting a mortice latch is a metre up from the floor (around 3 feet), but you can either match existing handle heights, ask the client how high they want them or check the drawing/schedule to find out which height to drill the handles.
Four panel doors and period doors often have a knob and mortise latch fitted to the centre of the lock rail. This can weaken some doors though so check with the manufacturer before drilling if you are looking to install the latch there.
Mark the height (this will be the center of the latch) in the narrow edge of the door jamb, and square a faint line round with a sharp pencil to where the handle will be fitted on both sides of the door (I say faint because you may need to sand it off later). Measure the distance from the front of the face plate to the centre of the spindle hole and mark that measurement on the rail (I set a combination square to this measurement to save time when fitting more than one latch) from the edge of the door.
Find and mark the center of the doors edge. You can guess this at first by setting a gauge as close as you can guess then push the pin into the door working from both sides. You know the exact centre of the door is exactly between the two pin holes.
- Step 2: Drill the door for the tubular latch
For standard handles or door knobs I drill a 16mm hole in from each side of the door - being careful not to go all the way through (for some door handles and knobs you need to use a hole saw to drill a large 2 1/4" hole).
Next, I use a 25mm flat wood bit to drill into the centre of the doors edge. I prefer flat wood bits for fitting a mortice latch but you can use augers. If it is a paneled door I put tape on the drill bit to mark the length of the mortise latch. This will help stop you drilling too deep into the door and coming out through the moulded panel.
|
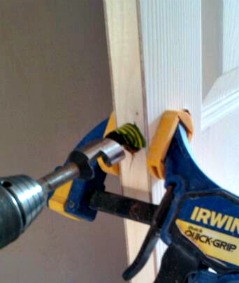
PRO TIP: Put a clamp on the door as well, especially if it is a thin or hollow core door. This will help ensure the door doesn’t split whilst drilling. Use a slow speed and the side handle of the drill if it has one. To prevent drilling out the side of the door, stop every now and then to check you are drilling the hole straight and level The size of the drill bit you use should be as large as possible without being wider than the face plate of the latch and without compromising where the screws will fix the latch to the door later. Clear any loose bits from the hole and push the latch inside. |
 |
- Step 3: Mark around the face plate
Make sure the centre of the latch is in line with the height previously marked on the door. Some people screw the latch to the door and mark carefully around it with a sharp Stanley knife, but its not accurate enough for me.
When fitting a mortice latch to make sure it is parallel and square I mark a small pencil line at the top and bottom edge of the latch, then use the combination square to square the lines across. I also set up a mortise or marking gauge to scribe the vertical edges.
- Step 4: Chop it in
Bang the 25mm chisel into the door just inside the top pencil line and with the flat edge of the chisel facing up. Turn the chisel upside down and repeat at the bottom - again, keeping just inside the lines. Now using the same technique for chopping out the hinge, remove the timber inside being careful to cut only as deep as the face-plate is thick.
Push it in every now and then to check, if you need to make it wider push the latch in, hold it tight to one side and use a sharp Stanley knife to cut down the other side. When it fits perfectly drill pilot holes and screw it to the door. If you do chop too much out cut some cardboard to put behind it and keep it flush with the face of the door.
- Step 5: How to fit the door handle/knob
After you've screwed the latch in push the square spindle through one of the holes in the side of the door, slide the handles/knobs on and screw them to the door. You can pilot drill again if necessary and use the combination square to make sure the handles are plumb/level.
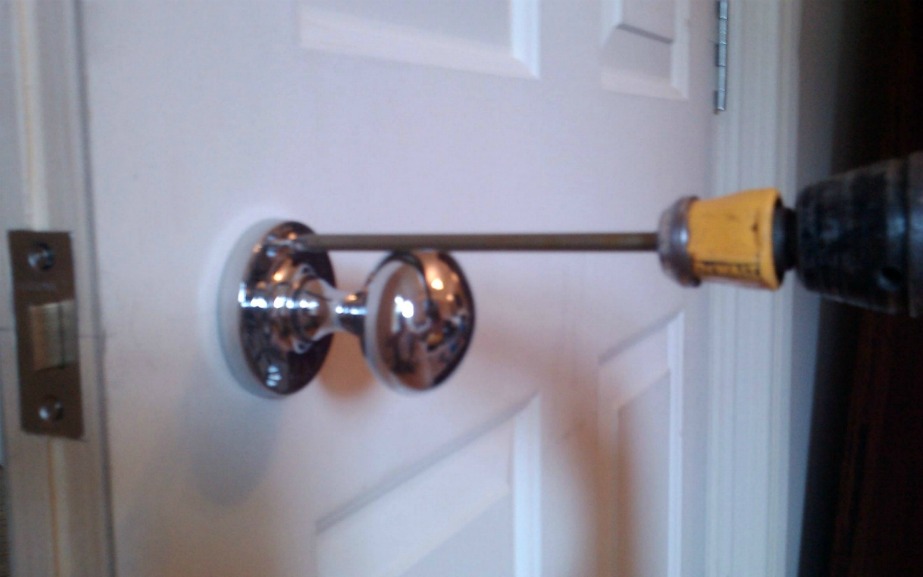
Sometimes door knobs are difficult to screw on without the drill chuck scratching the door knob. In this instance mark the positions of the holes on the door, remove the knob and pilot drill before using a long Pozi-bit or screwdriver to screw the knob onto the door.
- Step 6: Fitting a mortice latch keep / strike plate on the lining / frame
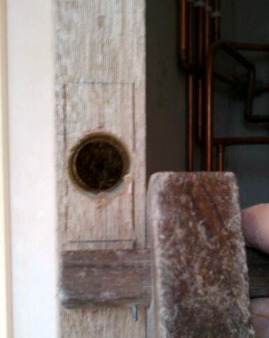
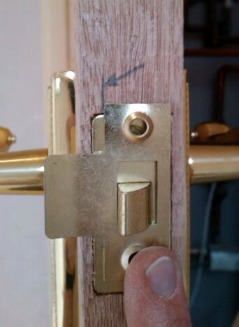
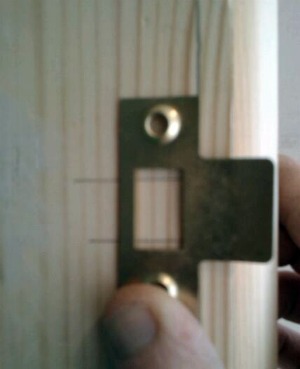
Push the door to the frame and where the latch strikes it mark the top and bottom of it with a sharp pencil. Square these across the widest part of the lining. Place the strike plate on so the two lines are central in the hole, like in the picture above. If you just draw round it now you'll end up with a loose fit when its chopped out because you are adding the thickness of the pencil lead all the way round. Instead, mark a small sharp pencil line at the top of the keep and the top of the strike plate. Move the keep up slightly, just enough to cover the pencil lines, then mark the bottom of the latch and striking plate. Again square these faintly across the lining.
 |
 |
- Step 7: Mark the keep the right distance in from the face of the lining
To make sure when the door closes it stops flush with the lining and wall, you need to put the keep against the latch, in the position it will be when the door is closed. Transfer a line onto the door from the edge of the keep closest to the door face, as in the picture.
Set your marking gauge to this line and scribe it into the lining in between the lines marked in step 6. Place the keep back on the lining so it is in line with all the marks and the new scribe. Mark the final edge and use either a sharp knife or the gauge to cut along it.
- Step 8: Chop the keep in
Carefully remove the timber inside the lines, using the same technique as for the door latch. Push the keep on and mark a pencil line all the way round the hole inside for the latch. Remove the keep and drill a 16mm hole about 10mm deep. Use the 10mm chisel to square the hole up, cutting at the top and bottom first. Fit the keep back on and screw to the lining.
Close the door till it clicks shut, flush with the lining.
How to fit the door stops to the frame after fitting a mortice latch
IMPORTANT: To get the door to close perfectly, whenever possible always fit the door stops after fitting a mortice latch.
Firstly, measure inside the head of the lining for the doorstop,in between the two jambs and cut the top to this length.
Before nailing the doorstop head in place, close the door so it is latched in position and nail with 40mm oval nails or a finish nail-gun if you have one. Leave at least a 2mm gap if the door and lining are to be painted so that it won’t ‘bind’. This may mean the door rattles at first but will ensure the door will still close perfectly after the decorator has applied 4 coats of paint (two to the frame & two to the door).
*TIP* For an even gap all the way around between the door and door stops use a piece of cardboard as a spacer when pinning the stops to the frame.
Do the same for the legs, if the door stop is bowed like a banana pin the top and bottom first so the middle bows away from the door. Then it's really easy to push the middle toward the door and pin it in place.
Finally use a nail punch to bury the heads of the pins just below the surface so they can be filled with some Ronseal Wood Filler.
Is the door not closing perfectly?
Click here for help adjusting a door so it closes properly.
What comes next?
After fitting a door latch and the doorstops are on you are ready to cut and fit the architraves around the door frame.
Use the comments box below to add your own tips on fitting a mortice latch!