How to mitre timber with perfect joins every time

Knowing how to mitre cut perfect joints with timber is an essential carpentry skill! The theory is easy but in practice can be difficult to accomplish. Ill fitting joints look awfully amateur and are more likely to open up or come apart in time leaving an unsightly gap.

Note, internal corner angles on materials like skirting boards and dado rails etc. should only ever be scribed. There are occasional exceptions like with a detailed intricate crown moulding that sits on top of kitchen units for example but generally scribing is better on inside angles.
The reason for this is because internal joints if mitred can/will open up when the timber shrinks and it's very difficult to neatly fill and decorate. It's something far less noticeable/likely when scribed. Also, you can get a perfect internal scribe no matter how out of square or level the walls are whereas this is not always possible when mitering.Click here to see how to cut internal scribes instead of mitres if that is what you are doing.
Anyway - how to mitre cut timber!
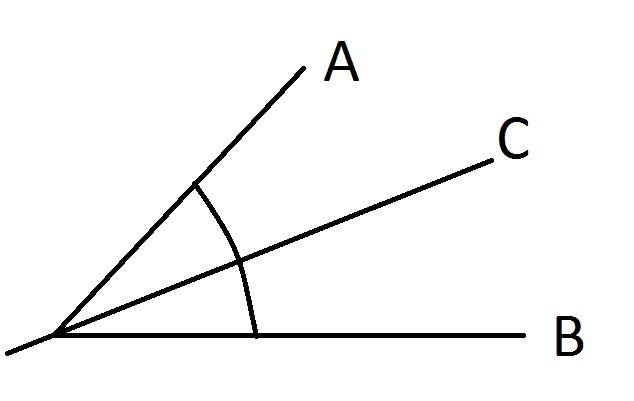
In any instance, when you cut a miter joint you always cut it at half the angle of the corner. So for a 90 degree corner, two 45 degree angles are cut. If the angle is 120 degrees, you would cut two 60 degree angles and so on.
Although the most common miter you will likely cut is 45 degrees for a 90 degree corner, having a special tool that can help you to bisect an unusual angle is a worthy investment and will save you time and lots of wasted timber.
In order to easily cut timber and get perfect 45° external mitre joints on site you will need either a mitre saw or a mitrebox.
When fitting a moulding that's going round a corner like skirting, dado rail or fascia for eg. I always fit the opposite end of the timber first, that butts into a wall or scribes into another piece. I leave cutting the mitre till last. Once the other end is fitted, instead of measuring and marking with a tape measure I find it more accurate to hold the timber exactly in place, tight in at one end and then physically marking the cut to make while in-situ. With the line marked on the back of the timber to cut, if it is a tall moulding like skirting board I place it on the mitre saw so the face is against the fence (away from me) and cut it from the back, where I can see the pencil line I am cutting to.
If i'm fitting a flat moulding like architrave the method is slightly different. I still cut and fit the opposite end first, only this time mark the inside edge of the moulding. Lay it flat on the saw bed, turn the blade to 45° and cut, keeping the blade to the waste side of the pencil line.
Getting the mitre to fit right
Once cut, quite often the mitre isn't perfect first time and needs to be 'tweaked' or adjusted slightly. This can be either because the corner you are cutting to is slightly out of square, the saw isn't perfectly set up to cut 45° or the timber wasn't sat right. Fine tuning and trimming a little off is easy with a powered mitre saw, but a little more difficult with a mitre box and hand saw.
Click here to go to basic carpentry