Different ways of Making a Bath Panel DIY
How to build the frame & an accessible wooden bath panel in either plain panel, tongue and groove, shaker style or with beaded panels for storage
Whenever I am making a bath panel I always make sure it is accessible and can be removed later. I learned the hard (and wet..) way in my own house by not doing this with my first DIY attempt!
So when the silicone seal around the edge of the bath broke and lots of water unnoticeably leaked through the floor, it absolutely ruined the ceiling in my study below.
Not only was my ceiling ruined, but I then also had to ruin the bath panel and the skirting boards so that I could get in to the underside of the bath and reinforce the framework holding the bathtub up!
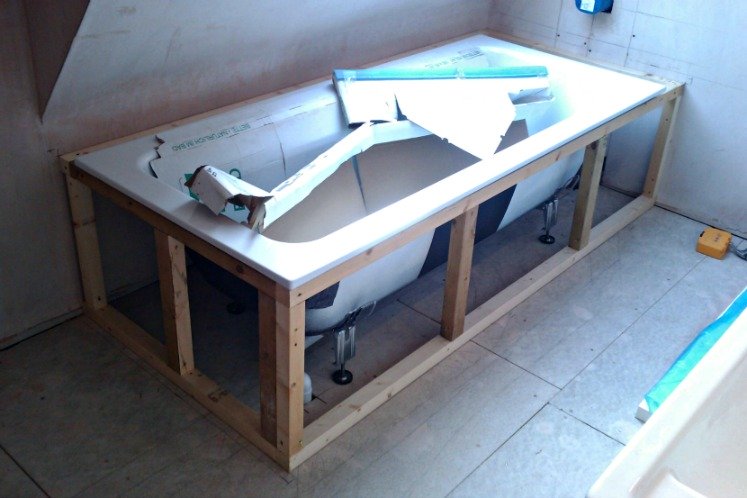
Once I had access I could prop the edge of the bath up more strongly like I should have done the first time. That meant there was no more movement that would cause the silicone seal to break again. Then finally, re-install the bath panel so it could be removed in the future more easily.
TOP TIP! When you are applying a thick silicone bead around the edge of your bath, fill the bath up with water first so it is weighed down low. This will help avoid the silicone seal breaking when it is filled up later on.
I have now rebuilt my bath panel so the whole side can come off for easy access (I don't know many slim plumbers..), but you can make bath panels to incorporate smaller accessible panels that are held in place either by velcro on the back (good invisible way of secretly fixing a tiled bath panel) or by using white screw caps or chrome mirror screws depending on which best suits the style of your bath panel and bathroom.
First up: Decide on the finish / style to make your DIY bath panel first, as this will dictate how you build the frame
In order to know how far to set back your stud work frame underneath the bathtub, you need to first decide what type of bath panel finish you are after and which sheet materials and thicknesses you will use to cover it.
Choose a design that compliments other areas of your home.

Modern contemporary bath panels tend to be simplistic and plain and are quite often tiled.
Making a bath panel with a shaker style can look pretty good too. You can do that, a tongue and groove effect bath panel or simply miter some beading onto a flat sheet of plywood or water resistant MDF to create faux panels that match the doors in your house for example.
Making a Shaker Style Bath Panel
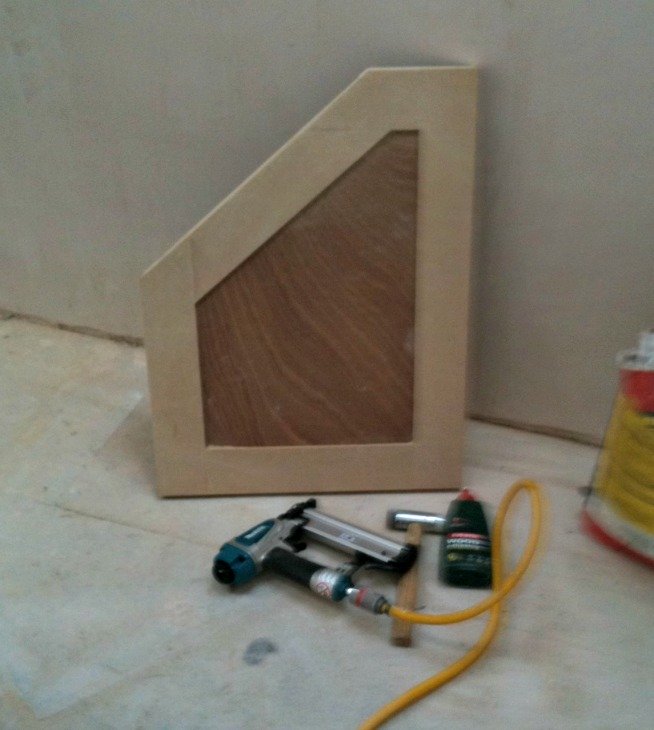
I don't have a picture of a shaker style bath panel I have made, but you can see from this little door that I have glued and pinned some timber onto how quick and easy it is give something a shaker style:
 |
 |
All I do when I am making a bath panel shaker style, is use moisture resistant MDF or marine ply to first create a flat panel then just add decorative strips of the same material by gluing and nailing them on to the panel.
Start with one across the bottom and the top, one down either side and then break up into equal sections if need be.
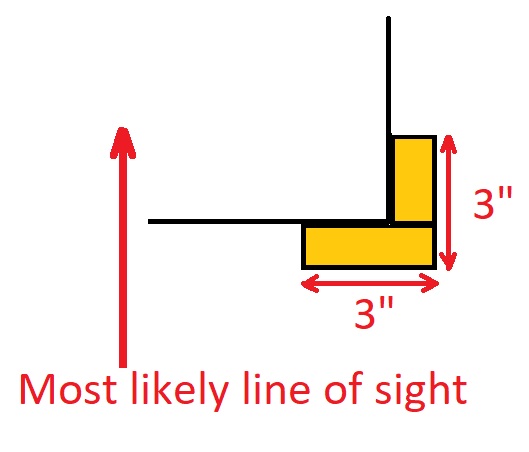
At a corner, a vertical mitered edge would unlikely hold up strongly for very long so cut the strips so that one will overhang the edge of the bath panel by the same thickness as the strip around the corner.
And the strip around the corner needs to be thinner, so that they are the same size overall when the overlapping one is taken into account.
Lastly, I always put a joint like that away from the main line of sight (for example not visible from the direction you would walk into the bathroom from) so that the join is less likely to be seen or is seen less often.
Tongue & Groove Effect Bath Panel
To achieve a tongue and groove effect bath panel there are two ways depending on whether or not the tongue and groove bath panel will be a painted or stained/varnished finish. If you are painting it, the easiest material to use is moisture resistant MDF sheets with a tongue & groove effect already machined into them. Because it's a sheet material it's really easy to install, and because it's MDF it's really easy to paint.
Once painted nobody should be able to notice it is not individual tongue and groove slats, and it doesn't suffer the problem of warping or twisting like pine tongue & groove boards can. If you cant get MDF with t&g grooves, you could router them in with a round-over router cutter, straight edge and clamps.
If you're not painting and want to stain or varnish the panel you'll need to use individual t&g slats. Slightly more fiddly, sometimes I put two battens down to fix all the slats to or another way is to glue them all to a thin sheet of plywood so you have one thick panel to fit. In this instance less stud work is needed under the bath as the panel is so strong.
The red arrows below show how I fix/nail tongue and groove boards. Fit the groove edge toward the wall and pin down that edge. From then on until the other end only fix through the tongue side at an angle, where it will be covered by the next board and won't be seen.
Apart from the two most outer boards, no nails should be visible at all.

For my own I used 9mm marine plywood and skirted it in like the rest of the room. To match the rest of my house which is full of decorative moldings I then fitted it with some fancy beading to create a paneled look that matched other areas of the house.
Whichever you want you will need to know the thicknesses of the materials you are covering it with before you start to build the stud-work that it will be fixed to.
If you're making a bath panel with MDF make sure you use moisture resistant MDF not the normal stuff, which will bubble up and not last very long.
It's worth getting at least one coat of paint on all sides and edges before fixing it in place too, then more coats on the face that will be more exposed to moisture (ideally use exterior grade paints). Then seal all edges with silicone once the paint is dry.
How to make a bath panel for tiles
If your bath panel will be tiled in, you will need to know the thickness of the tiles + adhesive and the thickness of the plywood that will cover the framework.
Also allow 3-4mm on top of those amounts when setting back from the edge of the bath so a silicone bead can again be applied at the end as well.
To make the tiled bath panel accessible, you can have a section that is held in place by strong magnets, velcro or drill through the whole thing and use screws and caps like before.
Build a solid & sturdy timber framework to support the bath edge and fix the bath panels on to
If making a bath panel that will be fitted in between two walls your bath may look something like the one below, or it might be tight up against the wall without the shelf.
You can see the markings on the floor, I always get the plumbers (those slim ones I mentioned earlier) to mark out the position of their pipes so nobody drills or screws through them when working in the bathroom.
A good practice whenever floors are being taken up - you'll understand if you've ever screwed through a pipe!
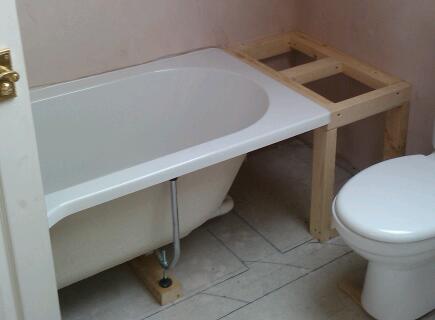
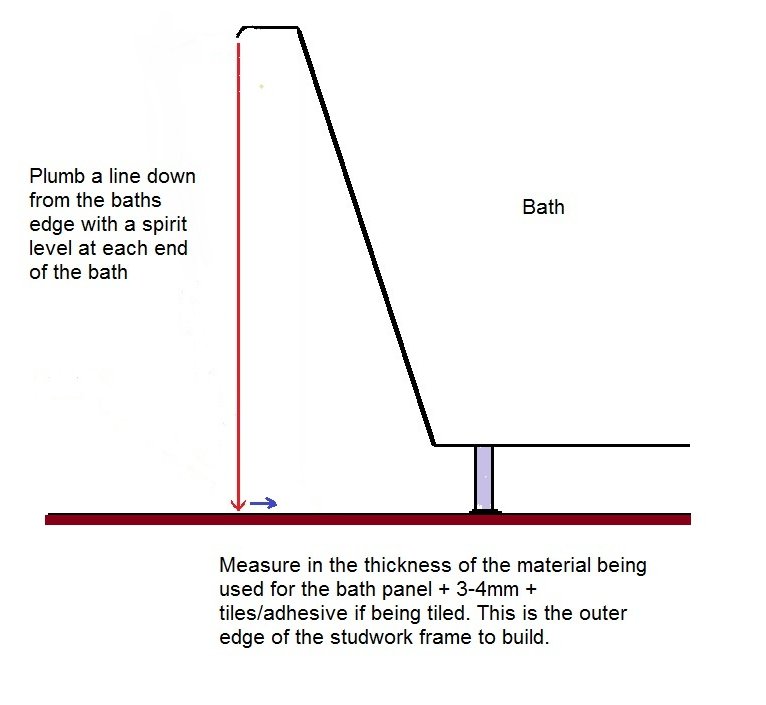
First, transfer the baths edge down and draw the outline of the bath onto the floor. Do that by using a spirit level to plumb a line down from the baths edge several points then join the dots with a straight edge.
Then, measure in from that line the thickness of the material being used to panel the bath (aqua board, ply, moisture resistant MDF,tongue and groove etc.) and remember to double up the material if making a bath panel shaker style.
Add another 2-3mm so it isn't flush because it will be easier to apply a silicone bead to the underside of the bath if it is stepped back very slightly. Mark this point at each end of the bath, in the middle and also down the walls.
Below is how to build the timber stud-work frame for an L shaped bath panel. If a bath isn't fitted between two walls a bath end panel may be needed as well.
When fitting out bathrooms I now always screw and Gripfill a timber batten to the walls with a couple of props down to the floor for the baths edge to sit on. Plastic baths especially can 'flex' and drop a bit when they're full of water and a person too, hence the reason to fill with water and pump silicone all the way around to stick it to the wall before tiling. That way it is definitely sealed and after the tiling a small bead can be re-applied to seal between the bath and tile.
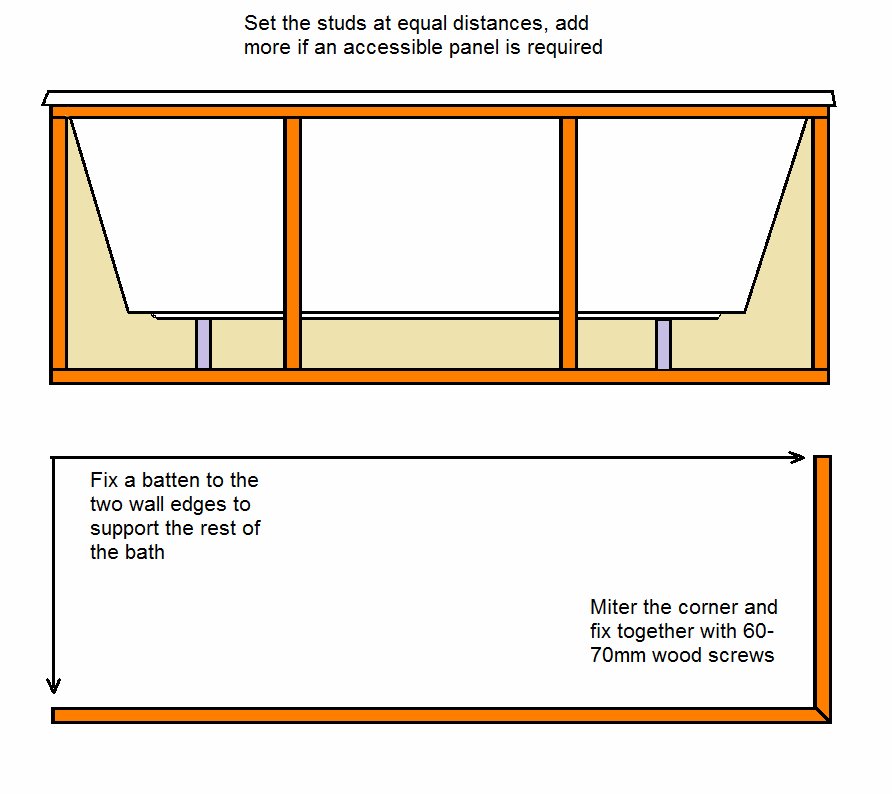
To support the baths edge and for something to fix the bath panel to I build a timber stud-work frame just like above. I either use 25x50 or 50x50mm planed timber and mitre the corner to get a good fixing.
Generally it can be easier to build the framework flat on the floor like a ladder and then fit it in place, other times (when the floor is out of level for eg.) you might find it easier to build/assemble it in place.
When screwing anything to the floors in a bathroom never use screws that will go through further than the thickness of the floor unless you're 100% sure there are no pipes/cables underneath, same goes for the walls.<p>In my bathroom the skirting runs continuously around the room and across the bath panel.
This creates a problem when making it removable, because the skirting boards need to be scribed either in or into at the ends.
So when I'm making a bath panel in a bathroom with skirting boards rather than first plying the panel and then skirting it, I fit the skirting first, but with a strip of plywood (or whatever the sheet material is I'm using) behind it that finishes about 6mm below the top edge of the skirting board.
This creates a small groove for the bath panel to sit down into and then it just needs screwing to the top of the framework built along the bath. Once painted, I put a silicone seal all the way around stopping any water getting through.
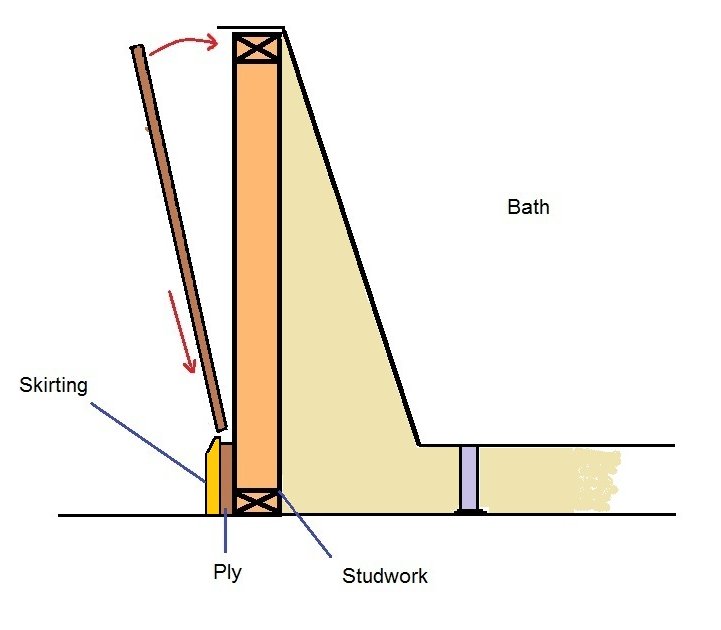
making a bath panel accessible like this means all you need to do later is run a sharp knife around the edge to break the silicone seal, then unscrew the top from the frame.
I realise that it looks like a stupid design that will catch water, but if you do a good job and it's a tight fit then it is honestly fine. And the silicone seal ensures nothing gets down in between.
Final stage of making a bath panel: Decoration
The last part of making a bath panel is applying the beading, or shaker style finish.
For beading, I cut a piece of timber about 50-75mm as a spacer and use it up against the wall, skirting and down from the bath edge to mark an equal margin all the way around the panel.
Then, I work out the centre of the panel and mark half the size of that packer/margin either side. Then I simply cut the beads inside those lines to create two beaded panels within it with an equal gap between them too.
What's next?
Once you have finished making the bath panel you can move onto installing the bathroom vanity units
Or click here for help boxing in any visible pipework
Use the comments section below to add your own tips for making a bath panel